Wednesday, March 9, 2011

Chapter 10

1.     Issue a Ipconfig command at the command prompt.  Try some of the popular switches such as /all and /?.  Capture a screen shot and write a paragraph about how you would use the command to troubleshoot a problem.  Put this information in your blog.
You can use Ipconfig to check your IP addressing.  Ipconfig /? Will show you all the commands and a brief description of what they do.  Use Ipconfig /all to list information such as IPv4 and IPv6 address, subnet mask, default gateway, subnet mask, MAC address, etc.  If you are using DHCP, you can use ipconfig /renew to obtain a new IP address.
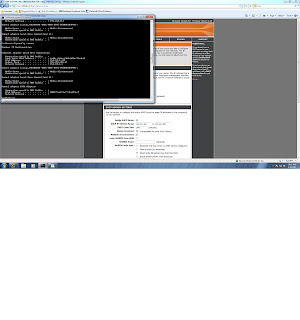
Sample of ipconfig /all
2.     Issue a Netstat command at the command prompt.  Try some of the popular switches such as - p and -a.  Capture a screen shot and write a paragraph about how you would use the command to troubleshoot a problem.  Put this information in your blog.
Using Netstat is great for troubleshooting if you are having problems with latency (lag).  It can give you information about current TCP/IP connections such as what port a connection is on and if it is active or just listening.  You can also get statistics about protocol types such as sent and received.
3.     Issue a Nbtstat command at the command prompt. Try some of the popular switches such as - r and -a.  Capture a screen shot and write a paragraph about how you would use the command to troubleshoot a problem.  Put this information in your blog.
Nbstat is pretty limited due to the fact that it can only be used on a machine with a Windows based OS and that NetBIOS needs to be running over TCP/IP to get the full benifit.  It can do some nice diagnostic work.  Nbstat -a Joe will give you the IP address of the machine named Joe on your network.  Nbstat -A 192.168.15.1 will give you the name of the machine on your network that has that IP address.  If you dont have a Windows system, this command will do you no good.
4.     Issue a Hostname command.
 Using the hostname command by itself will return the host name of the current client.  If you wanted to rename a client to JPBigBoat, you would type hostname JPBigBoat.
5.     Use the Nslookup command to view the IP address of at least three domain names. Capture a screen shot and list the class of IP address for each domain.  Put this information in your blog.
 google.com is a Class A IP
hotmail.com is a Class A IP
ibm.com is a Class B IP
6.     Issue a Tracert command at home. Capture a screen shot and write a paragraph about how you would use the command to troubleshoot a problem.  Put this information in your blog.
By using Traceroute you can follow the path of data one node at a time.  What tracert does is send a few UDP datagrams to an IP address with a TTL of 1.  When these datagrams expire, they are sent back to the source.  At that point, tracert issues another set of datagrams to the same IP address but with a TTL of 2.  This is repeated until the datagrams reach the destination IP, hit a firewall, a node that is down or does not accept ICMP transmissions.  If one of the latter happen, you may have found your problem.  


Chapter 4 Hosts File

First off, you need to start off by finding the HOSTS file.  Its really buried so just be patient.  First, go to your System root folder (the drive where Windows is installed, then the Windows folder).  Then open the System32 folder, followed by the Drivers folder, then the Etc folder.  Here you will find the HOSTS file, notice that it doesn't have a file extention.


To edit this file, double click it and select Notepad as the program to use to open.  Once in, you can type the IP address followed by a space then the hosts name.  You can even give it an alias, like a nickname for a site that you can type in the address bar and still bring up the site.

Chapter 4 DHCP

Setting up a DHCP pool on the DLINK router was pretty simple.  You really just needed to figure out the pool (range) of IP addresses you want to use.  Make sure you are under the Basic Tab then under the Network Settings selection.

 Next, you need to input the IP address range.  You can use just about any IP address since this router uses NAT to translate your local network IP into a public internet IP.

After you change the IP address pool changed, you can check to see if your computer was automatically assigned a new one by using the ipconfig /all command.  If you find that it is still using the old IP range, try the ipconfig /renew command.  It will release your current IP and request a new one from the DHCP server.

Once you get your new IP address, you should be able to use the ping command to ping yourself and others on your network.

Chapter 4 WireShark

TCP

Source port: 80  Its using this of HTTP
Destination port: 57850
The flag set is the ACK(Acknowledgement).  Means that packets were received.
Source IP:     74.125.47.17
Destination IP:   192.168.0.198  going through my router
The packet is going to my computer
Time To Live (TTL):   54  which means it can hope from 54 different routing devices before it is dropped by   the network
Differentiated Services field:  The actual value is 40.  This field is used as a order of precedence tool for routers.  Tells routers how important the packet is.
Protocol field is set to TCP.  Tells what transport layer protocol will receive the datagram.
That the IP header length was 20 bytes.
Its using an Ethernet_II frame type.
Source MAC:  e4:5b:8e (00:18:e7:e4:5b:8e)
Destination MAC:  00:03:25:48:0d:6a    This is the address for my wired connection.  This frame is going to my computer.


UDP
Source Port:  60307
Destination Port:  3544
Flag:  0x00  No flag is set
Source IP:  192.168.0.198
Destination IP:  224.0.0.253
TTL:  1  Guess this one didnt live to long!!
Source MAC:  00:03:25:48:0d:6a
Destination MAC:  01:00:5e:00:00:fd
The Time to Live was only one!


ARP
Destination MAC address:  00:18:e7:e4:5b:8e  It is the requested information of the ARP.  The source address requested the physical address of the destination IP.
Source MAC:  00:03:25:48:0d:6a
Destination IP:  192.168.0.1  Thats my router.
Source IP:  192.168.0.198  My computer

Its nice to actually see with my own eyes what an ARP request looks like.  The source location (my computer) sending a MAC address request to the destination (my router, where an ARP table exists with a cross reference of IP's and MAC addresses).


Wireshark is a great program to visualize networking protocols.  You get to actually see the data headers for each type of protocol and see how each protocol is used.  You also get to see how they all work together.  Wireshark can help you diagnose problems with your network, find a source of a secruity issue, or just monitor the traffic on your network.

Chapter 3 Ethernet Cables

Ahh yes, a day of playing with sharp objects.


First we snipped a little sheathing off and exposed the wirery goodness on the inside.


After getting the 8 color coded wires in the correct order, the RJ-45 connector was crimped in place.


Next we went and made a wall adapter for the RJ-45.  Basically the same first steps, strip the wire, seperate the color coded wires.  Then insert each wire into the correct spot on the back of the block.  The end product looks like this: